
Walking Triangles in action.
Continuing from last month's post on Marching Squares found here, I would like to introduce a variant of it that I've termed Walking Triangles. While working on the Marching Squares post, I had a eureka moment about how to reduce the number of cases we need to handle, simplifying the algorithm while hopefully increasing the fidelity of the generated isolines.
Controversially, I'll open with the results. I'd hoped there would be a big difference between the two approaches, but truth be told, the gap between them is quite small. With Walking Triangles, you gain a lot of accuracy on both sharp and wide-sweeping curves but little on the straight segments. As the line fits very well to the 'true' location of the contour, noisy areas of the heightmap where neighboring values differ greatly end up with wobbly lines.
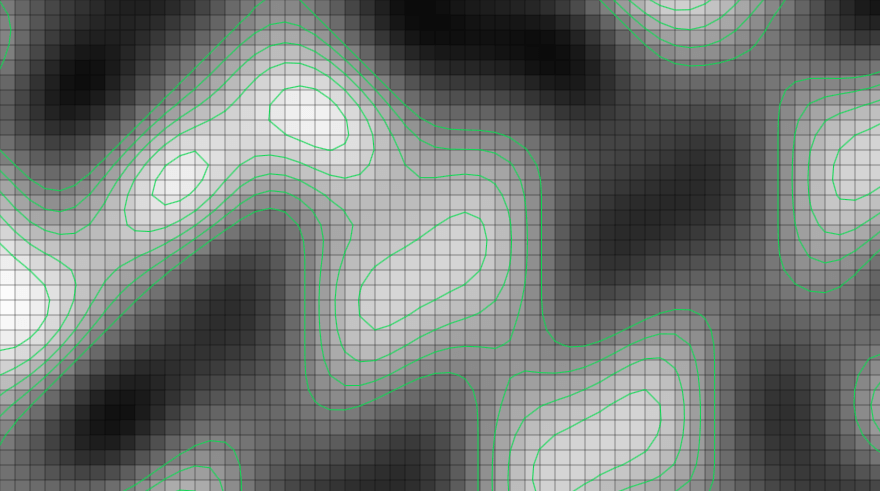
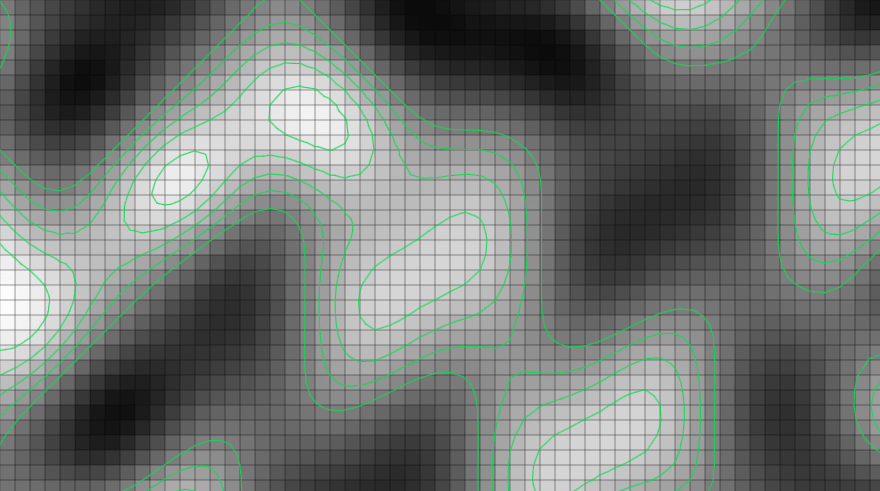
Marching Squares vs Walking Triangles
You may need to swipe back and forth a few times to see the difference between the two. If squeezing those last few drops of accuracy is what you want, this is the algorithm for you. Unfortunately, it comes with a 1.2x to 1.8x performance hit versus Marching Squares, but it's simpler to implement, with fewer cases to handle in fewer lines of code.
Understanding the Algorithm
Walking Triangles is a variant of Marching Squares where instead of taking 2x2 samples as a square, it subdivides each 2x2 sample into two triangles; one upper triangle and one lower triangle.
Tackling the problem this way has several advantages. The first is that the number of cases you need to consider cuts from 16 to 8. The second is that the cases where you need to draw a line can all be handled in the same manner, vastly simplifying our code. The final advantage is that with two triangles instead of a square, the isoline can 'pivot' around the center point of the two triangles allowing us to generate contours that more tightly follow the actual height map.

From the above diagram, we can see quite clearly that, like Marching Squares, when only one corner is active or inactive we can handle them in precisely the same way. Unlike Marching Squares, this describes every case we have to consider. Thus the algorithm is quite a bit easier to implement.
However, there is one major drawback. By cutting our square in two, we have doubled the processing we have to do - in practice, it won't be double, but the hit is still significant. We can take the same steps as we did for Marching Squares to moderate this hit, keeping only the triangles we know have points for the next step and ignoring the rest does a lot to ameliorate this issue.
Implementation
For simplicity, all the support code relating to creating the grid, etc. will remain the same as in the previous post on Marching Squares. If you haven't read that, you can find it here.
walkingTriangles.ts
type Vertex = [number, number];

type Corner = {
  pos: Vertex,
  edges: [Vertex, Vertex],
};

type Triangle = [Corner, Corner, Corner];

const generateTriangles = (grid: number[][]): Triangle[] => {
  const triangles: Triangle[] = [];

  for (let x = 0; x < grid.length - 1; x += 1) {
    for (let y = 0; y < grid[x].length - 1; y += 1) {
      const A: Vertex = [x, y];
      const B: Vertex = [x + 1, y];
      const C: Vertex = [x + 1, y + 1];
      const D: Vertex = [x, y + 1];

      /*
      * A _____ B
      * |     /
      * |   /
      * | /
      * D
      */
      triangles.push([
        { pos: A, edges: [B, D] },
        { pos: B, edges: [A, D] },
        { pos: D, edges: [A, B] },
      ]);

      /*
      *         B
      *       / |
      *     /   |
      *   /     |
      * D _____ C
      */
      triangles.push([
        { pos: C, edges: [B, D] },
        { pos: B, edges: [C, D] },
        { pos: D, edges: [B, C] },
      ]);
    }
  }

  return triangles;
};

const findPoint = (
  start: Vertex,
  end: Vertex,
  grid: number[][],
  threshold: number,
): Vertex => {
  const [x1, y1] = start;
  const [x2, y2] = end;
  const val1 = grid[x1][y1];
  const val2 = grid[x2][y2];
  const howFar = ((threshold - val1) / (val2 - val1));

  return [
    lerp(x1, x2, howFar),
    lerp(y1, y2, howFar),
  ];
};

export const walkingTriangles = (
  grid: number[][],
  thresholds: number[],
  ctx: CanvasRenderingContext2D,
  colour = green,
) => {
  let triangles = generateTriangles(grid);

  for (let i = 0; i < thresholds.length; i += 1) {
    const newTriangles: Triangle[] = [];
    const threshold = thresholds[i];

    triangles.forEach((triangle) => {
      const above: Corner[] = [];
      const below: Corner[] = [];

      triangle.forEach((corner) => {
        const [x, y] = corner.pos;
        if (grid[x][y] >= threshold) {
          above.push(corner);
        } else {
          below.push(corner);
        }
      });

      if (above.length === 1 || below.length === 1) {
        const corner = above.length === 1 ? above[0] : below[0];
        const p1: Vertex = findPoint(corner.pos, corner.edges[0], grid, threshold);
        const p2: Vertex = findPoint(corner.pos, corner.edges[1], grid, threshold);
        line(p1, p2, ctx, colour);
      }

      if (above.length > 1) {
        newTriangles.push(triangle);
      }
    });

    triangles = newTriangles;
  }
};
As you can see, there is not a lot to Walking Triangles. Once you split the square in two and work over triangles, the code itself becomes elegant in its simplicity. Succinctly, for each triangle, if there is one corner above or below the threshold, we draw an isoline between the two edges attached to that corner. Otherwise, we ignore it and carry on. See below for the live demo.
In conclusion, Walking Triangles trades performance for slightly increased isoline accuracy. If you are generating maps, graphs, etc. where accuracy is important, or if you don't mind being patient, it's the option to choose.
In the limited demo above performance of both Squares and Triangles is measured in fractions of a second with a fairly decent result, but as you can see, the difference is not all that great. Other than that, it's a fun and easy algorithm to implement. This post concludes the short two-part series on contour generation, but who knows, perhaps there is more in the future.